Amazon Web Services Storage allows you to make sure that you always have sufficent storage space for your customers. Using cloud storage option also minimizes the latency for your user to access their media results as data could be avaiable via CDN framework of the cloud vendors.
Create Amazon S3 Bucket
To be able to use your Amazon S3 bucket, follow these steps to setup integration.
Step 1
If you don’t have a AWS account, sign up here
Step 2
Once you are logged into your AWS Management Console, select Amazon S3 from the menu list or from the search field.
Step 3
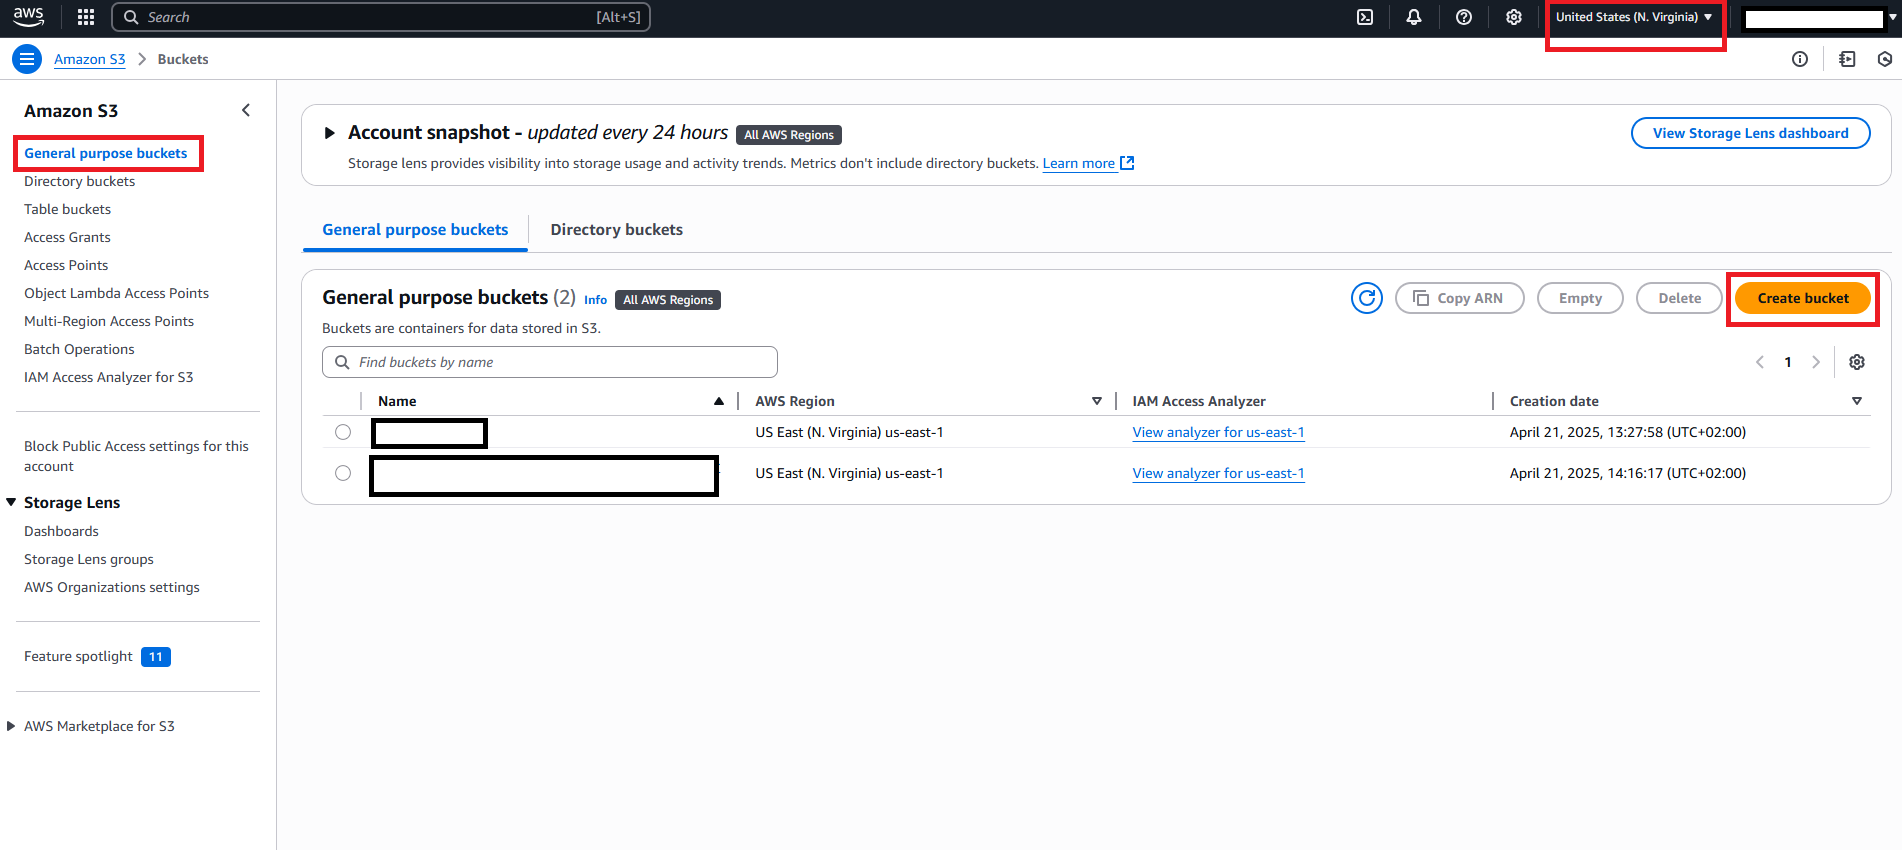
On the Amazon S3 page, select General Purpose Buckets on the left menu panel and then click on the Create bucket button.
Note - Please note that all s3 buckets are region specific, so make sure you are selecting the right AWS region for you on the top right corner.
Step 4
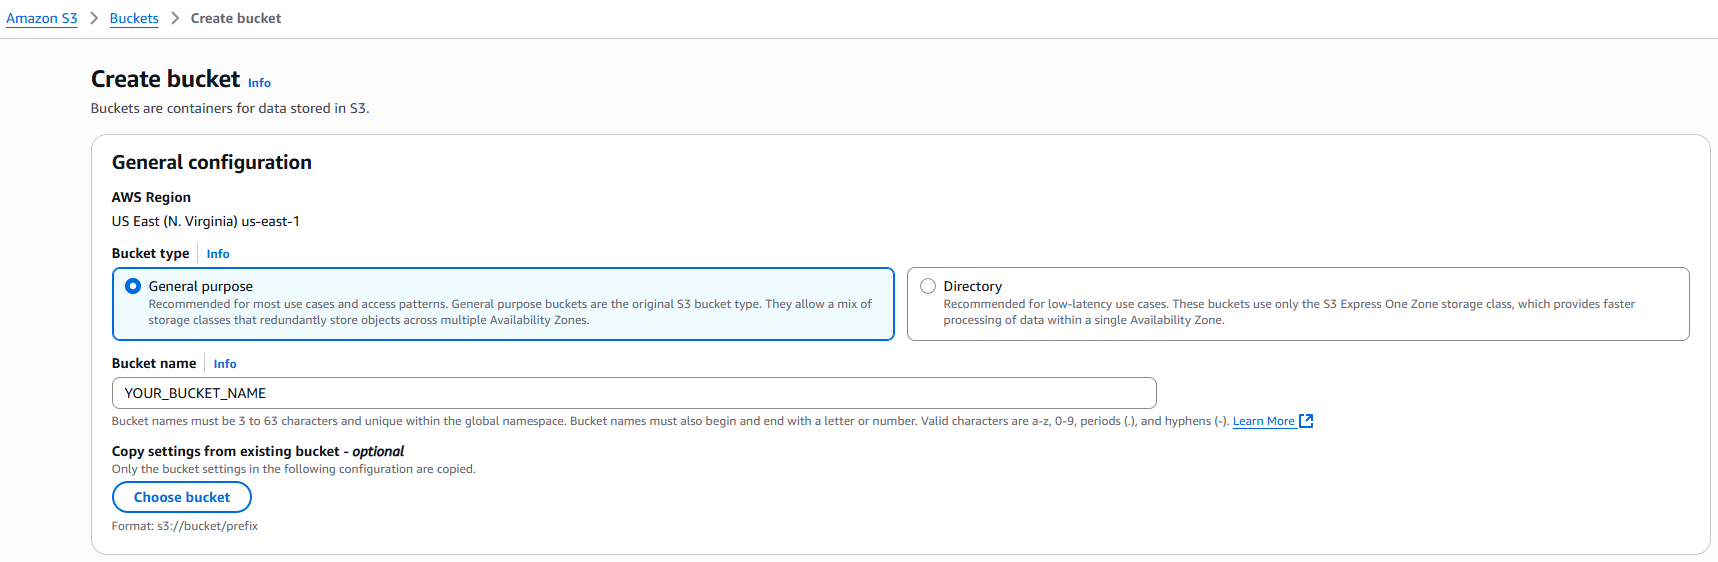
Next fill in the following information:
1 - For Bucket Type select General purpose and provide a valid Bucket name
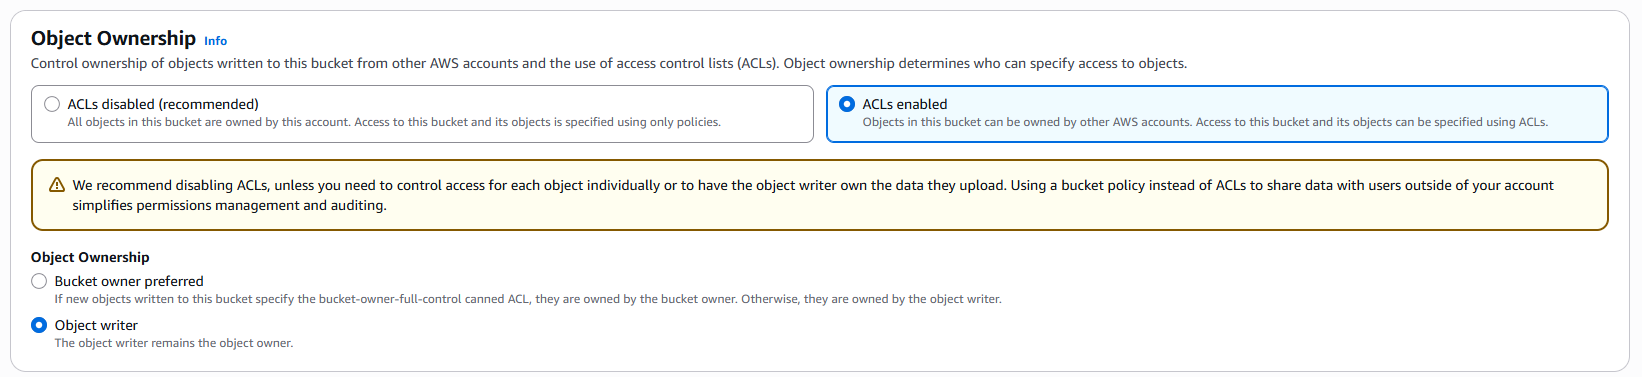
2 - Under Object Ownership, select ACLs enabled and for Object Ownership select Object writer.
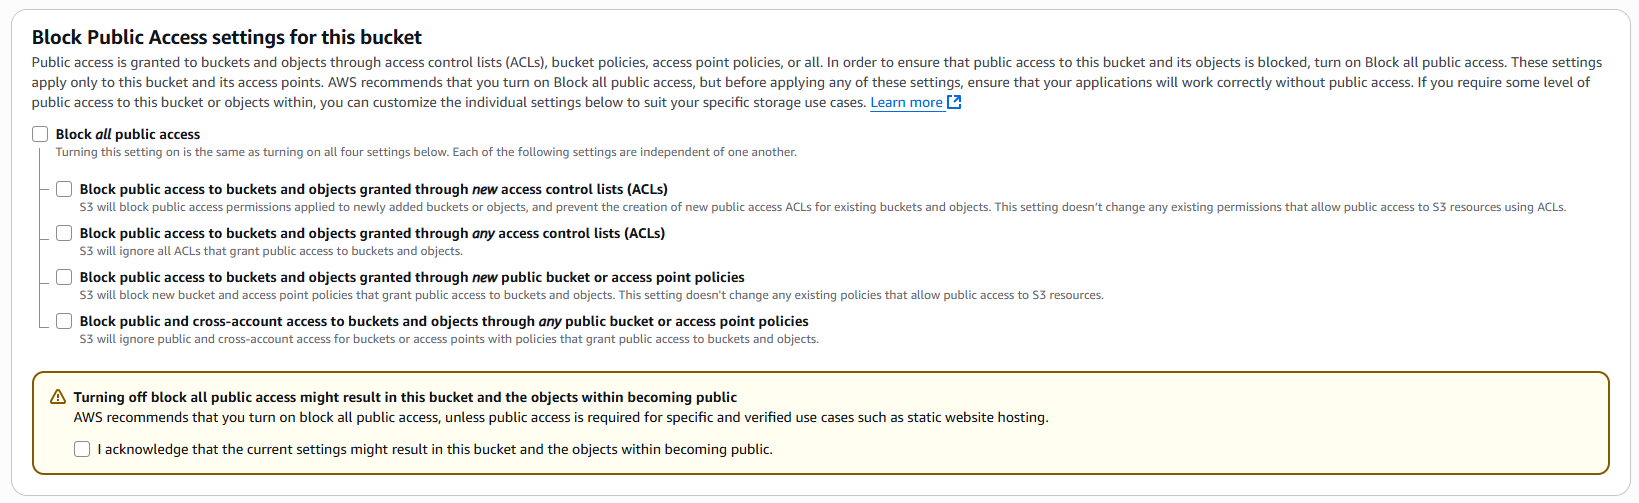
3 - For Block Publicc Access for this bucket deselect Block all public access for this bucket.
4 - You can leave rest of the settings in their default stages and click on the Crate bucket button.
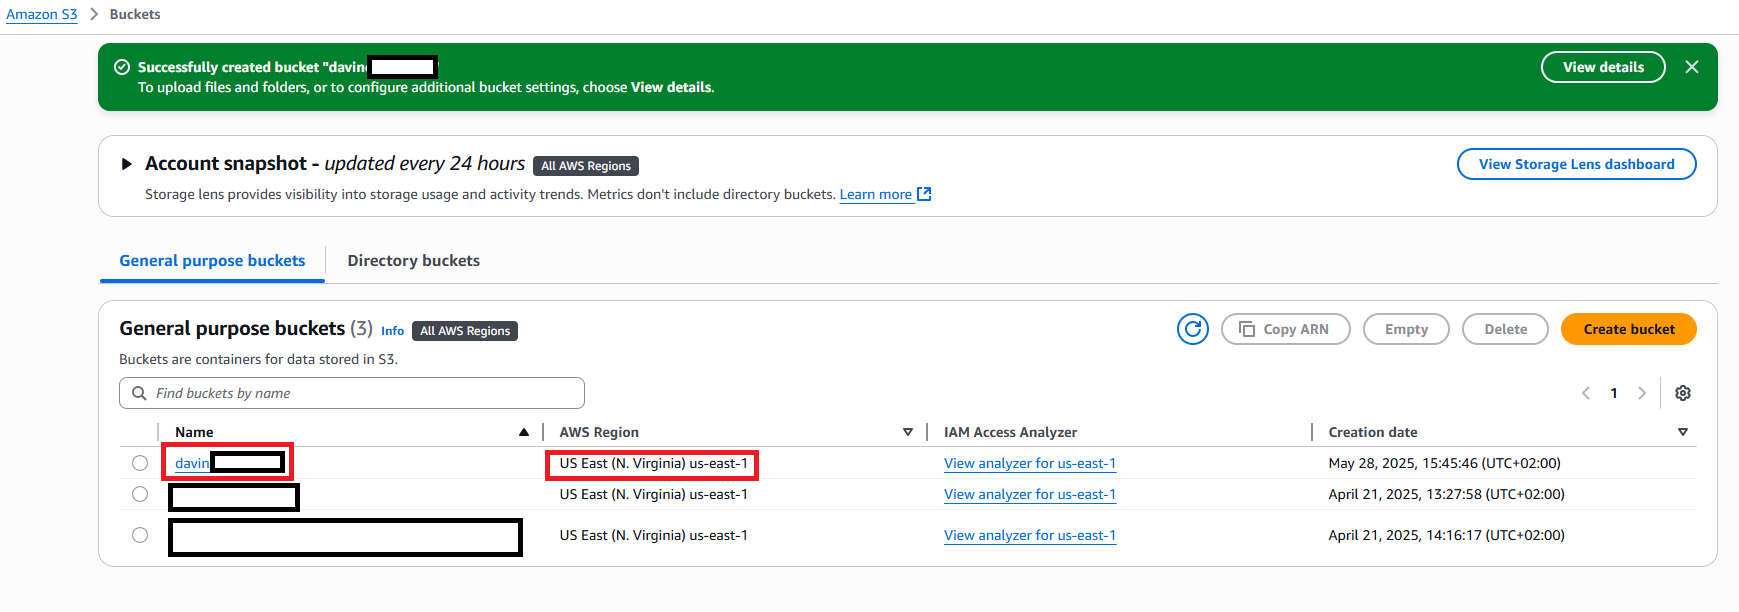
Step 5
Now you have your S3 bucket created, pay close attention to the region, you will need to specify the region id as well along with the bucket name in the settings page.
Click on your newly created bucket name.
Step 6
Once you are on the selected bucket page, click on the Permissions tab and scroll down to Cross-origin resource sharing (CORS) section.
Step 7
Enter following CORS configuration and click on Save changes button.
[
{
"AllowedHeaders": [
"*"
],
"AllowedMethods": [
"POST",
"PUT",
"GET",
"HEAD",
"DELETE"
],
"AllowedOrigins": [
"*"
],
"ExposeHeaders": [
"ETag"
],
"MaxAgeSeconds": 30000
}
]
Save the above
Step 8
Enter the details in your terminal
Enter valid Access Key and Secret Access Key for IAM user with S3FullAccess policy attached.
Comments (0)